After installing a range hood, the main step is to figure out a proper location for the exhaust fan and drill it out. The whole process can become tricky and quite challenging if you have to drill in a brick wall for the vent.
If you are looking for proper guidelines to get through this process, you are at the right place, as I will share my personal experience on how you can get it done like a pro.
How to drill into bricks for range vent? Use a drill machine with a circular saw bit to make a hole of 6-inch diameter. You can also use a grinder for this purpose. Another way is to make multiple holes in a circular shape and then remove the brick and debris. Once done, fix the ductwork, place the range hood, supply power connections, and test its working.
The process of drilling into brick and installation of range hood might seem easy, but the whole process becomes quite tricky when you start working on it. You will need proper guidelines and measurements while doing it practically, and that is what I have written in this article.
Steps To Drill Into Bricks For Range Vent
Following are some guidelines and steps that will help you in solving the matter :
1. Mark the outline
Take the measurements and mark the screw holes outline to lay the duct and range hood on the wall. This step is very critical because it will determine the orientation of the range hood.
Mark the outline with a pencil and use color tape to make it visible. It will help if you are careful while markings to avoid any smoke leaks. A little mistake in markings can cause a waste of your money, so be careful with this step.
2. Making the hole for the Range vent
The next step is the main step on which the whole process of installation of range hood depends. In this step, a hole is made in the wall, and debris inside the hole is removed. The ductwork is then fitted into the hole.
There are three ways to make a hole in the wall. You can follow any of these steps to make a hole.
You may have to rent out a drill if you don’t have one, as buying a new one can be extremely expensive. You can also get the bits from the same renting company.
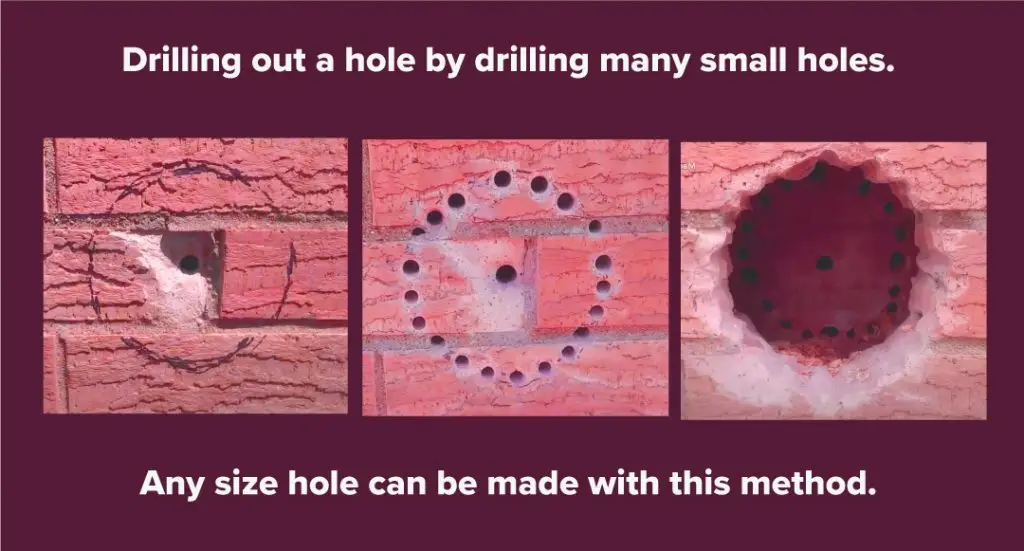
Solution 1: Make Multiple Holes in a Circular Path
Mark a circular line on the wall where you want to lay your range vent.
Draw another line ¼ inch apart from the first line. Now, drill a series of holes by considering that the holes should not be spaced more than ¼ inches apart. Use a hammer drill with masonry drill bits.

Use a ½ inch concrete bit which is long enough to make a hole through the wall.
Now, move to the exterior of the wall and start drilling the same circle. To align it perfectly, you can drill a hole in the center of the circle through the wall and make that as a reference.
While making holes, place the drill perpendicular to the wall. Start drilling at slow speeds before speeding it up with higher pressure. This will turn out the hole for the vent neat and clean. Make sure to take enough breaks for the drill to cool down.
When you are done with drilling holes from inside out, use a hammer and a chisel to break the brick between the holes. To remove the debris, use a small brush.
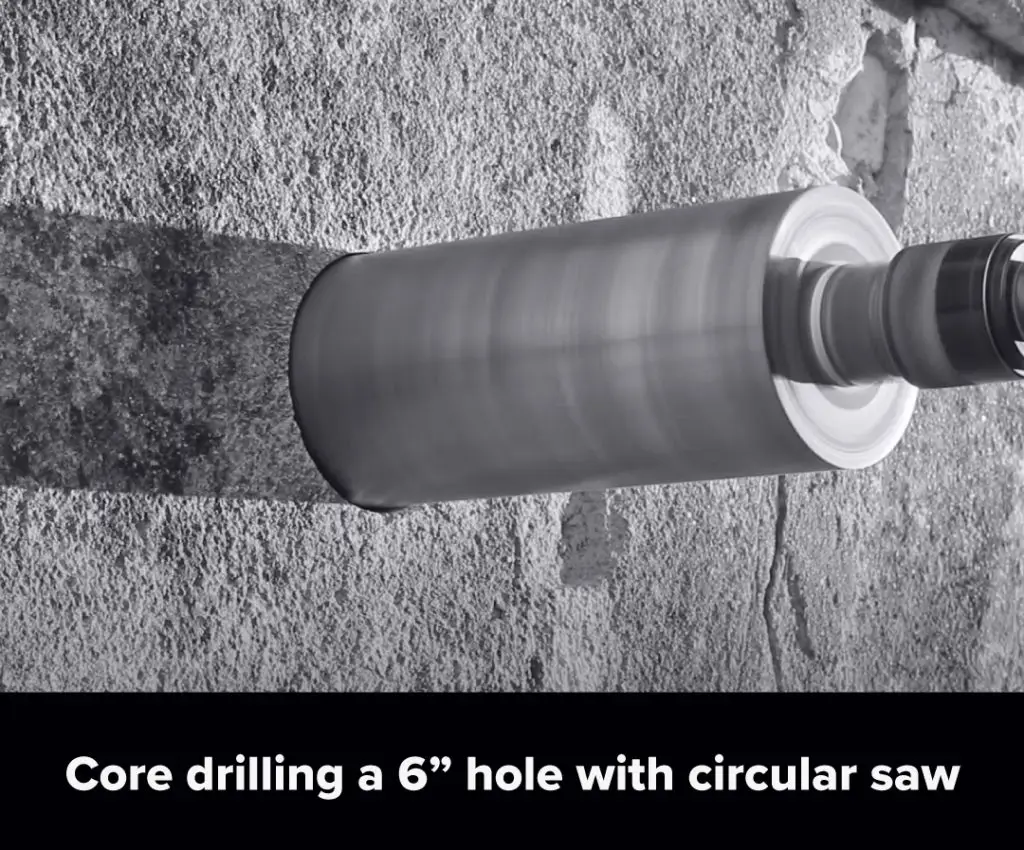
Method 2: Use A Circular Saw – Core Drilling
Another method to make a big circular hole is to use a circular saw.
A 6.0″ circular saw fitted with a masonry blade will cut the brick and the mortar. The depth of a circular saw is short, so you will have to remove the debris time after time, along with making holes.

This method produces a lot of debris in the entire process you have to remove manually or using a dry vacuum.
The result will be a neat and clean 6″ hole that will cater to the vent’s duct pipe. You can also the circular saws in many other sizes and can select one as per your need.
You can get many types of saws on Amazon; however, I recommend this one from Amazon.
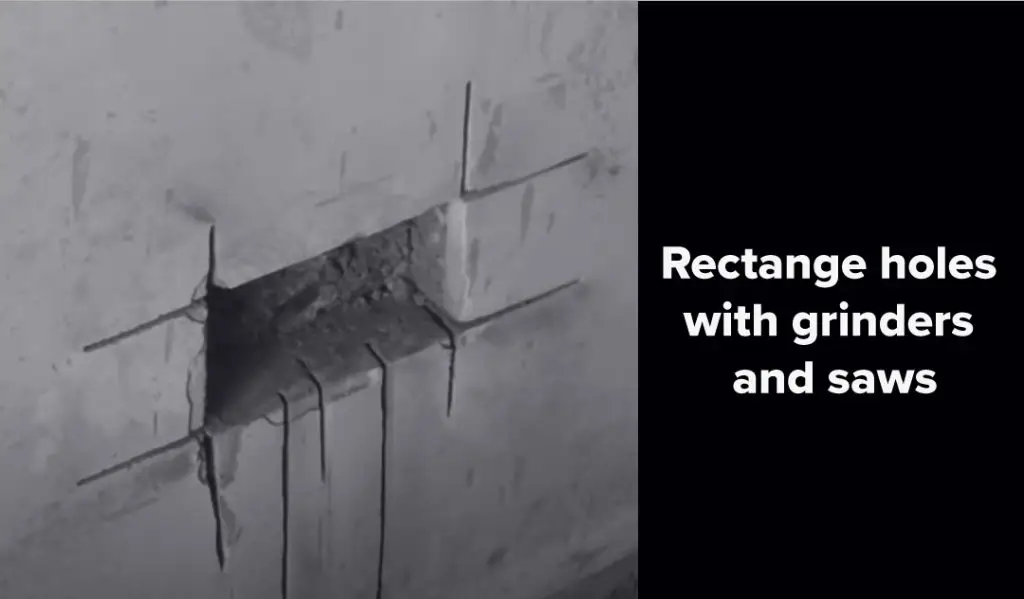
Method 3: Use An Angle Grinder
This method is more suitable for non-circular holes. An angle grinder can be a great tool for such type of holes required for rectangular ducts.
Also, keep in mind that this method will not work for thicker walls.

Use an angle grinder with a masonry wheel to cut both the brick and mortar, focussing tighter angles.
This is a very skillful task and will require a lot of effort. The end result won’t be neat and clean, but workable.
3. Mount Range Hood
Before getting into this step, you will need an extra helping hand to hold the range hood if you have no prior experience.
In this step, hold the range hood over the layout properly, considering the hood’s orientation.
Use a screwdriver to tighten the screws. You can use a power screwdriver to make the task quick and easy.
Do not forget to seal the space between range and wall by using silicone caulk. It will prevent leakages by making it airtight.
You can also use tape for joining the hood to the duct to hold it in a position.
4. Install Duct Cap
A piece of range hood that covers the mounted duct on the wall is called a duct cap.
It covers the duct and gives an organized and neat look to your work.
Place it over the duct and connect it with the range hood by tightening the screws using a screwdriver.
5. Assemble The Range Hood
The last step of this process is to assemble the range hood and connect it to the power supply.
Connect the electrical cable to the power clamp considering the color code carefully. Assemble the range hood by putting back the electrical and lighting housing into the range hood to test how it works ;)
What To Consider Before Ducting The Rangehood
The fundamental things you need to consider while ducting your range hood are your ductwork’s length, shape, and size.
The size of the roof cap is also an important point to note before ducting.
To make your range hood work efficiently, the ducting should be as short and straight as possible.
#1 Length of Ductwork
It is important to consider the ductwork length because the blower will have to work harder for a larger length. After all, the air has to travel further through the duct. Try keeping the duct length as small as possible for greater efficiency.

#2 Size of Roof Cap
Another thing to be taken into consideration is the size of the roof cap. The size of the roof cap needs to be the same as the size of your ductwork.
#3 Shape of Ductwork
If you have bends or elbows in ducting, then don’t place them nearer than 18 inches to the hood to ensure the range hood’s proper functioning.
Recommended Tools
You will need to get a good quality cordless drill for this task. You can also rent one from a renting company.
I have made a list of different drills, and you can choose one according to your need and budget.
Also note that, don’t select a budget drill for this task and select one with a hammering feature.
Related Questions:
How to drill a 4″ hole in the brick for the vent?
Use a drill with a 4″ bit to drill the hole. If you don’t have a 4″ inch drill bit, then draw a circle 4 inches in diameter on the wall.
Use a drill to make multiple small holes from inside, out of the circle, or use a chisel and hammer to cut out a hole.
How to install a bathroom vent through a brick wall?
Use a diamond hole saw to drill a hole in the wall for a bathroom vent. But if this method is not affordable, then make small multiple holes and chisel it out.
After drilling the hole, all you need is to place the bathroom vent in the appropriate place, at last, supply the power connections.
How to make a hole in the brick without a hammer drill?
If you want to make holes in a brick wall without a drill, use a circular saw to drill out a hole. You can also use a grinder for that purpose. The result won’t be too clean but will work out.
You can also use a simple chisel for this task. Again, the hole will be irregular and won’t look neat.
