Drilling into a plastered brick wall for hanging clocks or fixing heavy shelves is a bit technical and nerve-racking. So, I did some research, experimented with different ways, and came up with a hassle-free drilling technique which I am going to share with you. Below is the complete guide.
How to drill into brick behind plaster? Start with a wood spur drill bit and drill till you reach the brick wall. Don’t turn on the hammering feature till that. Then replace the drill bit with a masonry one, and start drilling at a slow speed. Turn on the hammering effect once you have drilled a pilot hole and increase the speed gradually concerning how deep you want to go. Back the drill out of the brick behind the plaster with opposite spin.
When drilling into bricks with plaster on the front, you’ll have to analyze the plaster’s quality and the perfect spot to drill in. Type of drill machine, drill bit, screw, and anchor plugs also has significant roles to play in securing a perfectly uncracked wall front.
Steps to Follow to Drill into Brick Behind Plaster
1- Analyse The Wall:
First and foremost, you have to assess the brick wall. Following are the regards you need to look into before drilling in:
A. Quality of the plaster on the surface of the brick:
Plaster can become loose and soft with time. Every plaster mixture has its own compressive strength, which accounts for bonding the plaster with bricks. With better strength and less shrinkage, the plaster is intact and doesn’t decay.
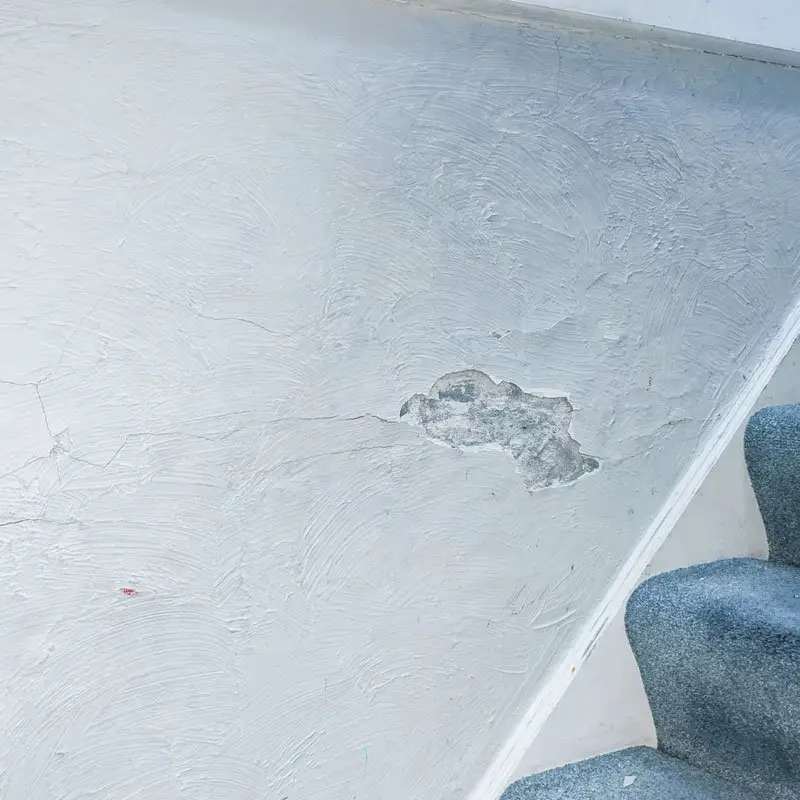
To know if the plaster is not powdery and cracked, tap with your fingers on the plaster wall. Feeble or no sound indicates a green signal for you to drill in.
If your plaster is loose, you should repair the area first. A soft plaster will crack when you drill in, causing harm to the look of the wall. It also won’t be fit for hanging heavy loads.
B. Consider electric wires or pipelines:
When you’re drilling, be sure you just don’t drill into electric wires.
There are certain codes of practice that electricians have to regard. An electric wire will always run perpendicularly to the switchboard. It won’t be diagonal. So keep in mind the route of the electric wires when drilling.
C. Mortar Lines of the brick wall:
Bricks are joined together with grout. This grout makes the mortar lines of the brick wall. Grout and plaster are weak than bricks. So you better not drill into a mortar line. Always drill into the center of the brick.
You won’t be able to tell if the brick wall is plastered but try your best judgment.
2. Choose the right kind of Drill Machine:
There are two types of drill machines that would be compatible with the work:
A. Hammer drill:
This drill driver has a hammering effect as well. When you are drilling into bricks behind the plaster, you’ll need a pounding effect to boom into the brick. A hammer drill will do the task.
But keep in mind, not to use the hammering feature on the plaster coating, else you can create cracks in it.
B. SDS Rotary Hammer Drill:
This is a more powerful and fast working drill machine used to drill into tough surfaces and concrete. If you are drilling a lot of holes into the brick wall, you should opt for an SDS rotary hammer drill.
This might be a little expensive than a normal hammer drill driver but is worth the job.
3. Choose the right drill bit:
You will have to change the drill bits and use a different one for the plaster & brick.
For plaster, use a simple wood spur drill bit for drilling. A normal masonry drill bit has dull tips, not good enough to make a clean plaster hole.
For the brick portion of the wall, you will need to secure a masonry bit in your drill machine. The most common bit used for drilling holes into brick behind plaster is 6mm or 7mm.
4. Pair a wall plug with the drill bit:
A wall plug (also called the anchor) is a plastic or fiber capsule inserted into the drill hole. A screw is then implanted inside this plug. This setup is important because it will firmly hold the screw into the brick wall.
There are three types of wall plugs used with the masonry drill. Their color denotes them;
- Brown (7mm plug) works with a 7mm drill bit.
- Red (6mm plug) works with a 6mm drill bit.
- Yellow (5mm plug) works with a 5mm drill bit.
5. Pair a screw with the wall plug:
- With a brown plug you will use 60mm 5 gauge screw. This is suitable for hanging 40 to 50 kg weight.
- With a red plug you will use 50mm 5 gauge screw. This can hold 20-40 kg weight.
- With a yellow plug you will use 40mm 4 gauge screw. This is good with 10-20 kg load.
Now that you are done with the prerequisites, we will go through the process of drilling into the brick behind a plaster wall.
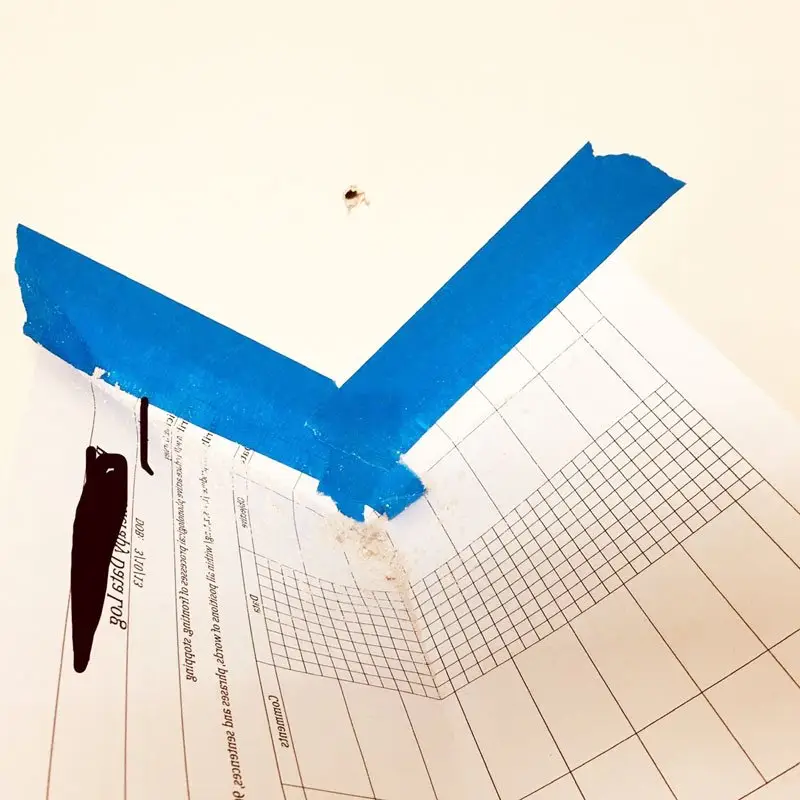
6. Mark the drilling spot:
With a pen or something that highlights the spot, mark the area you want to drill in. Stick a transparent masking tape onto the area. Masking tape will prevent the loose plaster from sloughing off.
You may also want to stick a paper tray to the wall below the area to collect the red brick debris that will exude out of the drilled hole. This way, you won’t have to clean the messy floor or won’t ruin your floor mats.
7. Drilling the plaster portion of the wall:
The first step will be drilling a hole in the plaster portion of the wall.
Make the initial hole in plaster with a spur drill bit till you reach the brick wall.
Keep it slow to avoid any damage to the drilling bit by the brick wall. Make sure to keep your drill in normal mode instead of hammer mode.
Before drilling, make sure your drill machine is not over your shoulder. Keep it just about the armpit and your face away from the wall.
Your drill machine needs to be at the right (90 degrees) angle to the wall. Also, wear shielding goggles.
8.Drilling the brick portion of the wall:
For drilling into the brick portion, change the drill bit to a masonry one. Adjust your depth guide according to how deep you want the hole to be. The depth guide is a long, slender iron rod that is attached to the drill. If you don’t have one, you can always use masking tape on the masonry drill bit.
Start with a pilot hole without turning on the hammering feature. Once you are 1/2″ inch deeper, gradually increase the speed and turn on the hammering feature if required.
Once you have reached the desired depth, rotate the drill in the opposite direction to pull it out to avoid any cracks in the plaster.
You can use paper to collect any debris from the drilling process.
9. Insert the Plug:
Please select the right size plug, and slip it into the hole. The plug must fit exactly in the drilled hole. Otherwise, the fixing would be bad.
A plug is important in the sense that it holds the screw firmly. Brittle and porous material like brick and plaster can’t let the screw withstand heavyweight if it’s directly driven into the hole, so an anchor is a must.
10. Drive the screw:
Change the drill’s bit with a suitable screwdriver drill. Turn on the screw driving mode of the drill.
Lightly hit your screw into the plug with a hammer. Now drive the screw with the drill machine into the plug. Go deep to the limit you want your screw inside the plug.
Congratulations! The job’s done.
Now, what if you have a brick and plaster wall with big holes because of some unfortunate attempts of drilling in the past. Or your plaster has cracks and is chipped off because of aging. Don’t grieve. You can easily repair it!
How to Fix Cracked Plaster if Broken Accidentally?
Follow the steps below to fix the broken plaster (this is a guide for a brick wall’s plaster repair, not drywall):
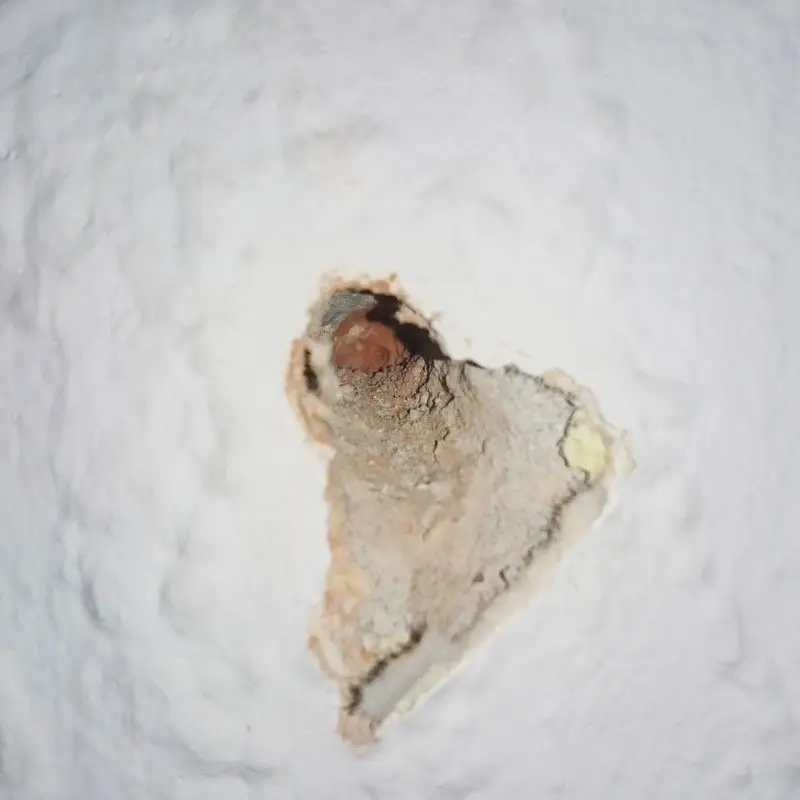
1. Clear off the loose plaster:
Use a pointed trowel to shed off any further loose plaster. You may also use a chisel with a hammer to clear off hard cracked plaster.
2. Brush with water:
Now that the brick is visible in the cleared spots. Brush the area with water. Water will not let the repairing mixture dry quickly and will help it bond with the bricks.
3. Apply Render:
A render is a mortar coating that has almost the same composition as plaster. Only it has more cement, and the sand used is coarse. Applying a layer of render is good for strengthening purposes.
After you have mixed your pre-blended render with the right amount of water, use a curved tip trowel to apply it in the area. Push the material hard to fill the gaps.
Don’t just fill to the top, leave some space for the plaster coat as well.
Leave the render coat for a couple of hours to dry completely.
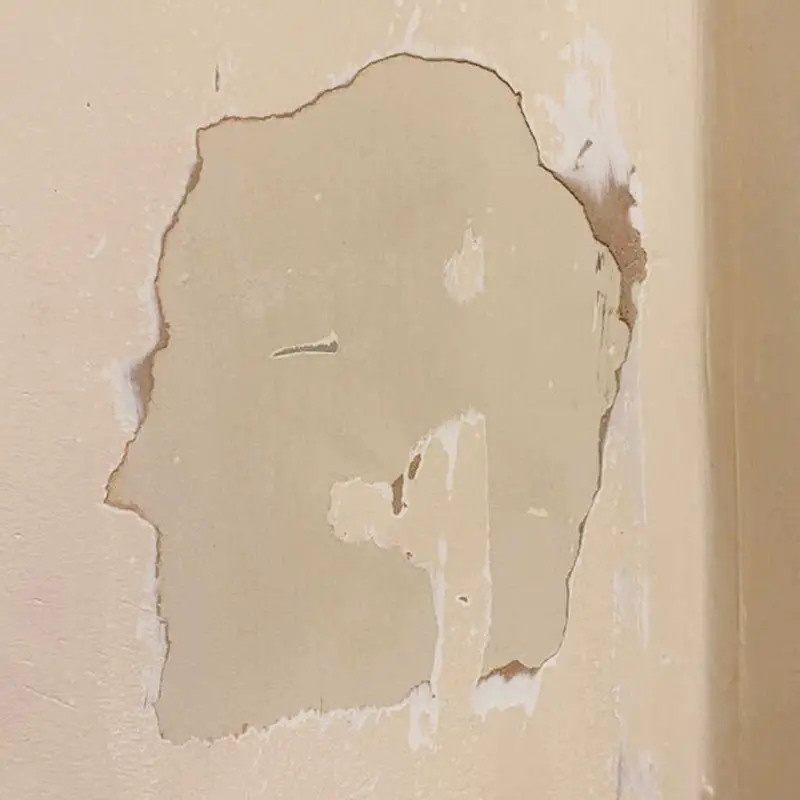
4. Apply a thin coat of plaster:
Now, apply a thin layer of pre-mixed plaster with help of a spatula (designed for plastering – also known as putty knife).
Smooth it out with the tool. Use the fathering technique, thick in the mid while becoming thinner and thinner on the sides. This way, the plaster will completely blend in with the old one.
Let the plaster layer dry out according to the instructions on the package of the plaster powder.
5. Go for a second skim coat:
Apply another thin layer, and make sure you level it up with the old plaster. Smooth it out with the spatula. Let it dry completely.
6. Rub with a sand paper:
Wrap your sandpaper on a wooden block and staple it over.
When the plaster has dried up, rub it with the sandpaper block to remove any divots.
Use a mask and eye protection because it’s a very dusty procedure.
7. Paint the area:
This is the last step of plaster repair. After you are satisfied with the smoothness and renovation, paint the newly plastered area in the same color as the old plaster.
Recommended Tools
You will need to get a good quality cordless drill for this task. You can also rent one from a rental company.
I have made a list of different drills, and you can choose one according to your need and budget.
Also note that, don’t select a budget drill for this task and select one with a hammering feature.
Related Questions:
What drill is best for a brick?
The best kind of drill for tough surfaces like brick and concrete are hammer drills, also called impact drills. Their pounding effect makes them powerful to blast in the bricks easily.
How to hang heavy things on plaster walls?
All you need to do is drill into the brick and plaster of the wall (You can also drill into the plasterboard of drywall). Insert a 6 or 7 mm wall plug into the hole, drive in a heavy-duty screw and hang your heavy things on it.
Why can’t I drill into my wall?
You can probably not drill in your wall because you might be using the wrong drill bit. For brick walls, always use a ‘masonry’ drill bit with a carbide tip. Also, check for the alignment of your drill with the wall. The plaster condition on your brick wall and the type of drill machine you are using also have roles to play.
What’s the difference between plastering and skimming?
Plastering is done to a new wall. While skimming is a renovating procedure. It’s a thin coat of plaster applied after rubbing the walls with sandpaper to upgrade it.
